
在完成了基础搭建工作后,虽然已经可以开始写文章了,但是觉得页面有些过于素净了,另外还存在一些bug,于是便有了以下的一系列折腾…
网上修改方案千千万,本文将只针对我做过的优化项,及我所踩过的坑进行列举
以下内容并非每一项都需要跟着做,只挑选个人认为有用或有意思的部分即可~
绑定个人域名
emm..关于个人域名的话,不绑定个人域名也完全没有问题,不会影响后续的任何使用
但是 引用博主吴润 · RunDouble的描述
域名是网站的入口,也是网站的第一印象,比如饿了么的官网的域名是:https://www.ele.me/ ,很是巧妙。常见的有com,cn,net,org等后缀,也有小众的xyz,me,io等后缀,根据你自己的喜好,选择不同的后缀,比较常见的选择是com后缀。很多小众奇特的后缀在大陆是没办法备案的,网站也就无法上线。然而使用GitHub托管我们的网站,完全不需要备案,因为托管我们的网站内容的服务器在美国,而且在国内备案流程也比较繁杂,时间需要一周左右。
正如此博主最终选择的域名,亦是如此巧妙 http://wu.run/
所以我也决定进行效仿,启用一个自己的个性化域名。
申请域名的地方有很多,国内比较主流的域名代理厂商有阿里云和腾讯云,
我选择的是从阿里云上购买域名并绑定:阿里云-为了无法计算的价值 申请入口:域名注册
购买域名这也是我们整个搭建过程中惟一一个需要花钱的地方。如果你已经有了空闲域名就无需购买,直接使用即可。
我在购买的时候只单纯购买了域名,不建议一次性购买太长时间例如5年10年虽然也不贵,但是毕竟第一次,7-10块钱买个一年的试试水,后续不喜欢了还可以随时更换。然后我是未增购任何增值服务,因为网站是托管在github上的所以也不需要备案等相关增值服务。后续如果自己有其他的需要可再自行增购。
购买好域名后,登录到阿里云,进入管理控制台找到域名列表,找到你购买的域名,进行实名认证,认证完毕后点击进入你购买的域名,点击域名解析
点击添加记录,此时可以看到有一些选项需要我们填写,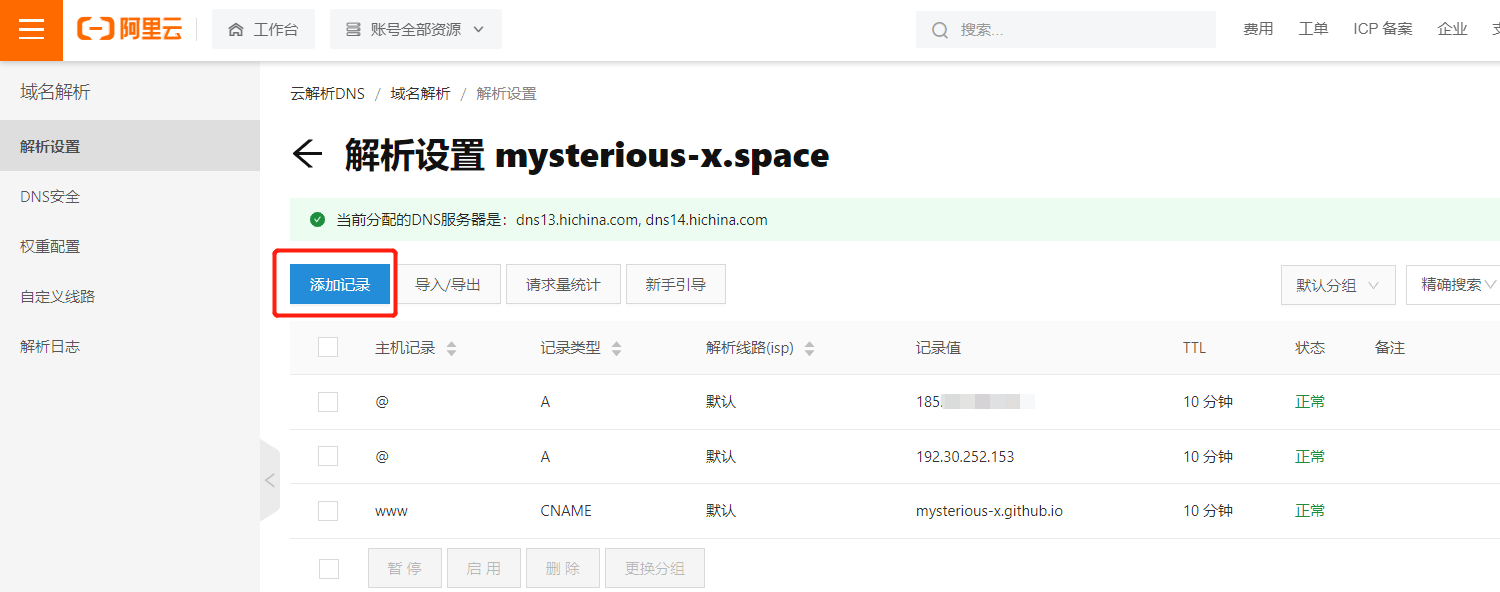
我这里一共添加了三条解析记录,可参考上图。
其中解析路线不用点进去选择,保持默认即可,TTL也保持默认,
需要修改的是 记录类型、主机记录、记录值 这三项
第一个主机记录的值我是通过ping自己的xxxx.github.io域名得出来的
第二个主机记录的值填写的是GitHub的地址是192.30.252.153
第三个记录类型是CNAME,CNAME的记录值是:你的实际用户名.github.io
在通过ping获取个人域名的ip时,意外发现cmd的位置在桌面时ping命令用不了(之前都正常的,就离谱)最终定位到是系统变量值中未添加c:\windows\system32
以上都添加好后登录回GitHub,进入之前创建的仓库,点击Settings,设置Custom domain,输入购买的域名,点save保存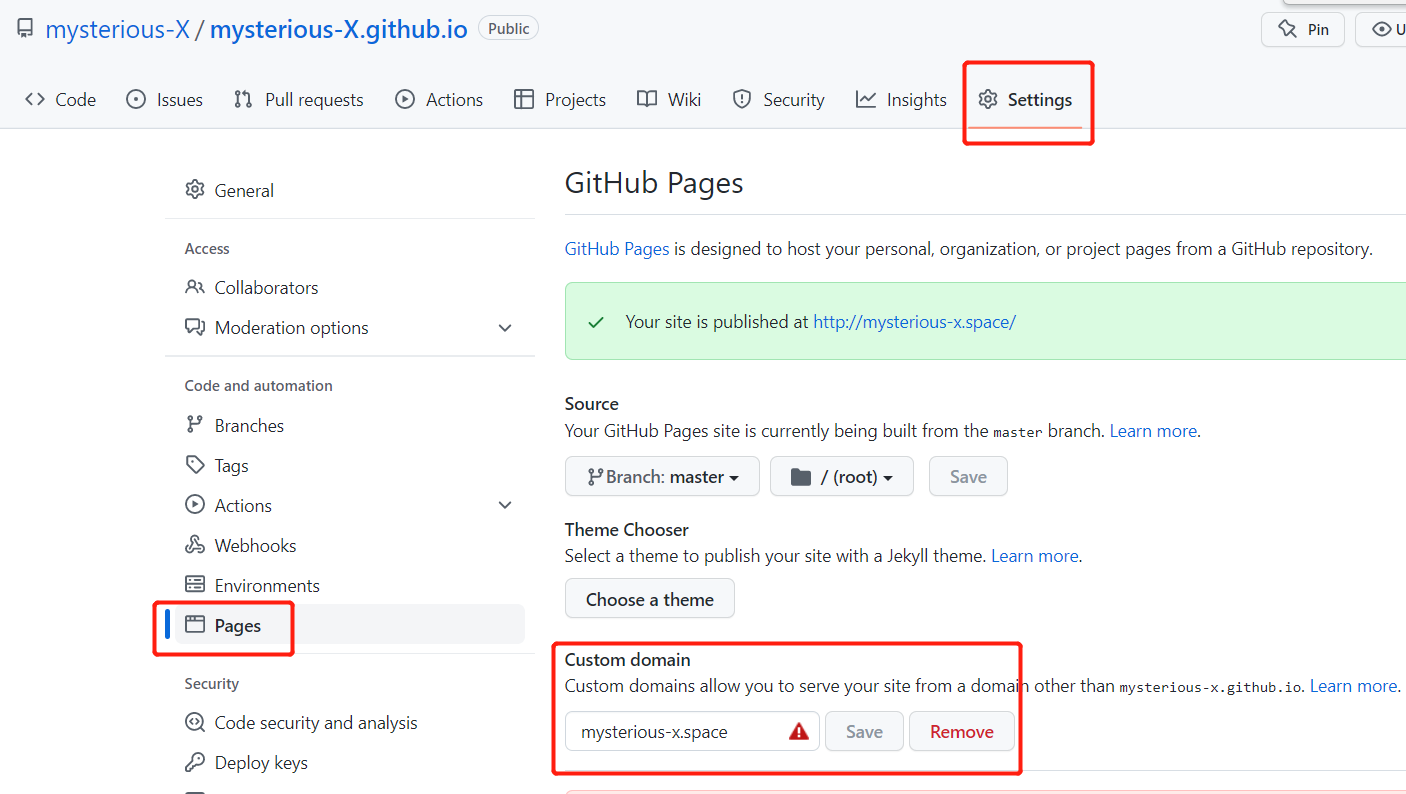
接着进入Hexo博客站点目录中的/source目录下,创建一个记事本文件,将你购买的域名输入进去。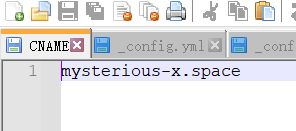
保存,文件命名为CNAME ,注意保存成所有文件而不是txt文件。
最后回到博客的Hexo站点目录内,点击右键打开Git bash here命令行,依次输入:
1 | hexo clean |
完成后打开浏览器在地址栏输入个性化域名就直接跳转到你自己搭建的网站上了。
实现效果
可以查看我的博客链接:
https://mysterious-x.github.io/
http://mysterious-x.space/
最终指向的都是space域名
区分配置文件位置
从此刻开始要明确注意区分配置文件位置
Hexo博客站点目录内的_config.yml 被称为站点配置文件
Hexo博客站点目录/themes/主题目录/ 内的_config.yml 被称为主题配置文件
例如我的next的主题配置文件位置:Blog/themes/next/_config.yml
这两个位置之后会经常用到,注意区分~!
修改网站相关信息
在博客的左侧页面可以显示一些基础信息
实现方法
通过修改站点配置文件_config.yml,进行相应的更改
1 | title: Mysterious-X的博客 #博客名 |
此处需要注意language和timezone都是有输入规范的,
博主此处踩坑,后续将网站主题换为next后,中文页面失效了,
由于主题被从默认状态替换为了主题状态,所以调用的主题配置文件不一样了,主题会去调用自带的language目录内文件,根据不同的主题,文件名可能是zh-CN或是zh-Hans可自行查看
例如我的next主题语言目录Blog/themes/next/language中的就是zh-Hans
后续又将站点配置文件中language:zh-CN改为了zh-Hans后恢复正常。
实现效果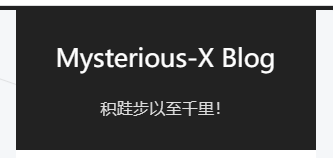
更换Hexo主题
后续补充:
由于博主也是第一次尝试搭建,所以用的是多数搭建教程中推荐的默认地址,Next 是5.1.4版本,会存在少量bug,但也都已成功处理了,处理办法在下面的正文中也有写到,不多,3~4处吧。也比较好处理。
博客优化了一多半之后,在某篇文章中了解到,博主用的这个next5.1.4 的主题源代码版本较为落后,已经停止更新了,还有其他版本例如6、7、8,
如果嫌麻烦的,也可以选择其他的next版本看看,配置都是大同小异的,可能部分需要略微做一些小的修改
建议此步直接跳转参考下一篇文章:升级next7部分,直接安装7.x的主题一步到位,7.x中大部分功能均已内置好,可以省去很多优化的时间,7.x文章中只针对7.x与5.x的变化项做了说明,7.x文章中没有找到的功能可以再返回本文继续参考修改方式。
NEXT主题历年的Github存储源
2014- 2017年
https://github.com/iissnan/hexo-theme-next
2018-2019
https://github.com/theme-next/hexo-theme-next
2020年
https://github.com/next-theme/hexo-theme-next
博主是主题是NexT,其Github网址为:iissnan/hexo-theme-next
实现方法
首先将NexT的主题源文件下载到本地,
在Hexo站点目录内使用Git克隆指令:
1 | git clone https://github.com/iissnan/hexo-theme-next themes/next |
修改站点配置文件:_config.yml找到theme属性,将其由默认主题landscape改为next。
然后执行部署指令:
1 | hexo clean |
最后通过本地浏览器访问localhost:4000进行预览,预览出现问题的 可参考下一段落安装next主题后页面乱码
在本地访问确认没问题以后,再部署到github上
1 | hexo d |
提交后便可以在互联网的博客上看到修改主题后的样式了。gexo d 提交后会有1-3分钟的延迟,看到站点没有第一时间更换过来不要着急!~
虽然上篇文章讲过,但是博主还是要再次强调,
之后的所有修改,无论配置文件或新建文章后都需要重新生成一下和部署到github上,有些时候新的功能或效果不生效,可尝试hexo clean清除缓存后,重新用hexo g 生成,然后再本地预览或推送到git上。hexo d和hexo s,两者的区别在于,前者是将博客部署到远程的Github上,而后者是运行在本地,通过localhost:4000在浏览器中访问。后者是为了调试配置方便而使用,但是最终本地博客还是需要hexo deploy指令将其部署至Github上
请牢记 hexo g + hexo d 和 hexo g + hexo s 这个两个组合~
生成 + 部署 生成 + 预览
实现效果
可以查看我的博客链接
安装next主题后页面乱码
安装完next主题后,本地预览是一堆代码
1 | “ {% extends ‘_layout.swig‘ %} {% import ‘_macro/post.swig‘ as post_templa |
查询到原因是hexo在5.0之后把部分功能/依赖给删除了需要自己手动安装
解决方案
安装依赖文件
1 | npm i hexo-renderer-swig |
参考文献:https://blog.csdn.net/qq_44774831/article/details/119278514
成功解决
设置主题模式
在Hexo主题中,有四种不同的模式,通过切换模式,让NexT主题显示不一样的样式。
修改主题配置文件: _config.yml,在其中找到scheme属性,可看到默认有4种主题模式
1 | # Schemes |
NexT主题默认使用Muse模式,笔者采用的是Pisces模式,读者可逐一尝试后,根据自己的喜好选择其中一种模式,取消掉前面的#号注释即可。
设置预览摘要
首页默认状态是显示所有文章的列表,和每一篇文章都显示所有内容,这样感觉看起来不舒服,这时候可以启用预览摘要模式
实现方法
修改主题配置文件: _config.yml 找到auto_excerpt属性,将enable设置为true ,将length设置为想要预览到的字数
1 | auto_excerpt: |
也可在文章中任意位置添加<!-- more -->
可自定义 [Read More] 按钮之前要显示的内容!
实现效果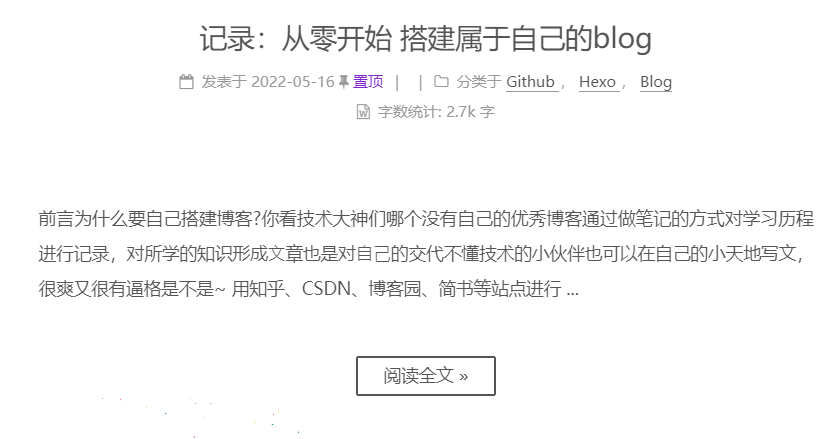
添加个人头像
实现方法
修改主题配置文件: _config.yml 找到avatar字段,进行修改:
1 | # Sidebar Avatar |
先将avatar字段前的#删除,然后粘贴上头像的目录位置或者链接。
博主是将头像图片保存在了主题目录下的source/images文件夹,也可以存放在站点目录下的source/uploads文件夹。也可以将自己的头像图片,保存在图床的某个地方,然后将对应的url地址复制过来,添加在avatar字段后即可。
实现效果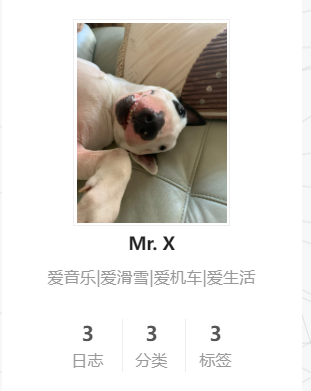
设置网站图标
实现方法
修改主题配置文件: _config.yml ,找到以下字段,进行相应的修改:
1 | # Put your favicon.ico into `hexo-site/source/` directory. |
博主也是将网站图标的图片保存在了主题目录下的source/images文件夹内。
实现效果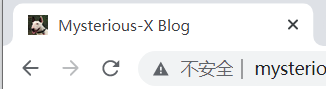
增加导航栏菜单选项
默认情况下,导航栏有首页、归档、关于三个选项,除此博主还添加了分类、标签和关于。
实现方法
修改主题配置文件: _config.yml,找到menu属性,将categories、 tags、about项前的 # 号注释去掉
1 | menu: |
然后执行如下命令
1 | hexo new page "categories" #添加分类页面 |
执行完上述指令后,在Hexo站点目录/source/文件夹下创建三个文件夹,命名分别为:categories、tags、about文件夹(一般会自动创建,没有的手动添加一下),在这些文件夹中分别会创建一个以index命名的Markdown文件,对这三个Markdown文件内容进行修改,使之分别为:
1 | --- |
完成文件的修改,然后重新部署Hexo即可完成菜单选项的添加。
实现效果
给文章添加标签及分类
实现方法
将需要置顶的文章打开,在文章的Front-matter中加上categories:``tags:即可。比如下面这样:
1 | --- |
其中categories项可通过添加或取消[ ]进行层级分级 例如:
1 | categories: |
或
1 | categories: |
将文章置顶
实现方法
在hexo站点目录打开Git bash执行下列命令
1 | npm uninstall hexo-generator-index --save |
然后在需要置顶的文章的Front-matter中加上top: true即可。比如下面这样:
1 | --- |
到目前为止,置顶功能已经可以实现了,但置顶的文章显示在最上面之后,并没有明确的置顶标志
打开:主题目录/layout/_macro 中的post.swig文件,定位到<div class="post-meta">标签下,插入如下代码:
1 | {% if post.top %} |
一定注意添加位置不要插入在其他的if endif 字段中间,注意格式
添加位置可参考此图: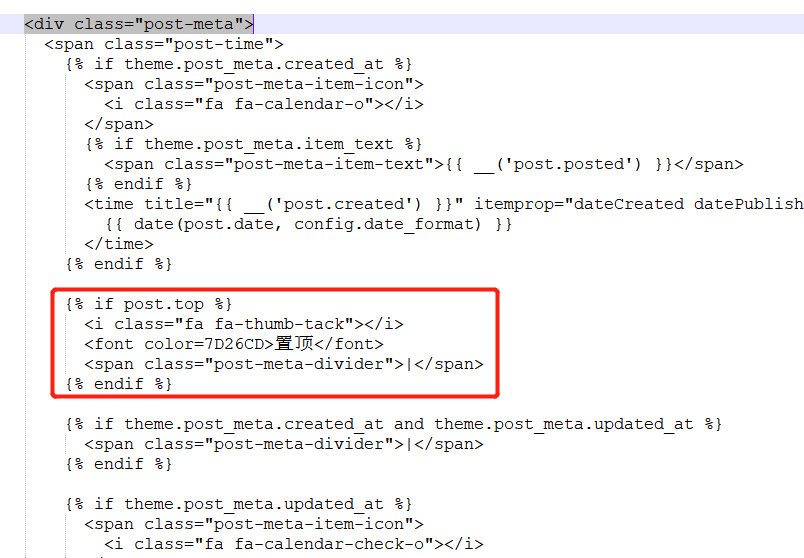
实现效果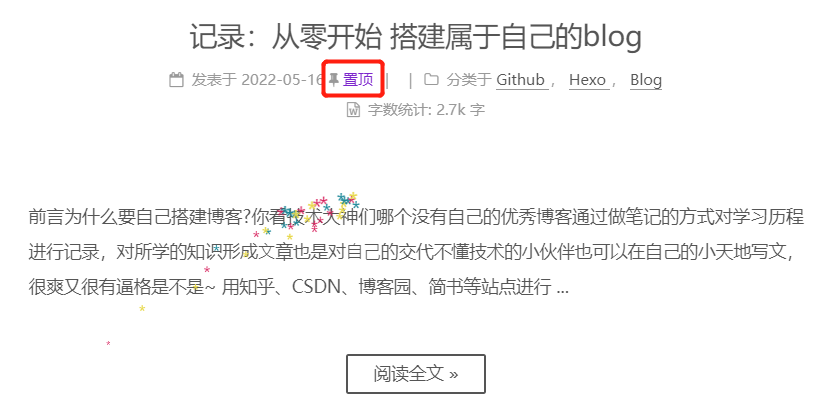
修复-导航栏选项跳转异常
点击导航栏中的标签、分类、关于 ,遇到Cannot GET/xxx错误时
解决办法
由于此next版本配置文件中默认 /与||之间是有空格的,把空格删除即可。
修改主题配置文件_config.yml
1 | menu: |
添加导航选项搜索功能
实现方法
Git bash执行以下命令
1 | npm install hexo-generator-searchdb --save |
然后打开站点配置文件_config.yml,在末尾添加以下代码
1 | # Search Config |
打开主题配置文件_config.yml,搜索local_search,修改以下代码,把enable的false改为true
1 | # Local Search |
实现效果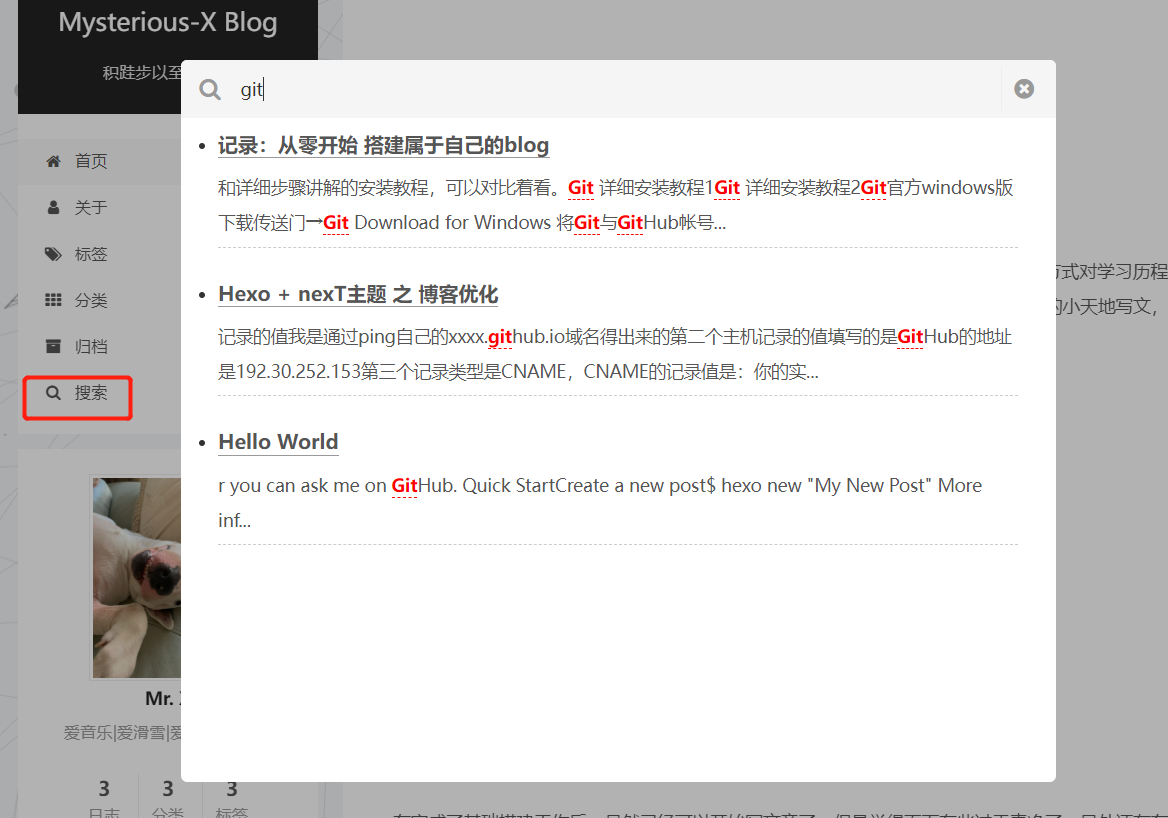
菜单标签页添加彩色标签
此功能虽然实现了,但此版本next主题的Unicode代码显示有问题是方框 □ ,我最终是将content行注释掉了,感兴趣的可参考一下几篇文章
实现方法
content: “\f02b”;
https://blog.csdn.net/qq_39974578/article/details/114172260
content: “?”;
https://blog.csdn.net/as480133937/article/details/100138838/?utm_medium=distribute.pc_relevant.none-task-blog-2~default~baidujs_title~default-1--blog-104806723.pc_relevant_antiscanv2&spm=1001.2101.3001.4242.2&utm_relevant_index=4
实现效果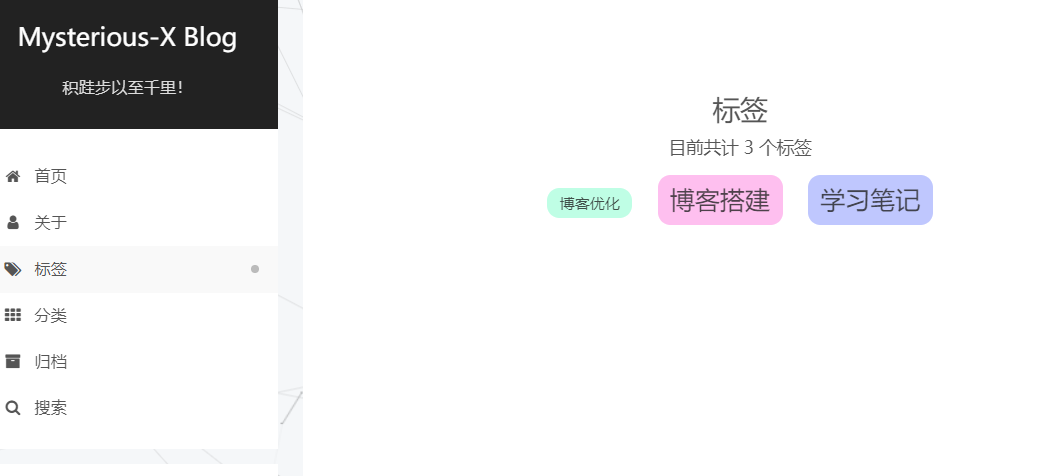
后续:
之后升级完next 7.x版本后,再次尝试,Unicode图标可以正常显示了,应该是5.x的bug或不兼容。

设置侧边栏显示效果
在next主题配置文件中,display属性有四种显示模式
实现方法
打开主题配置文件_config.yml找到Sidebar Display字段,display属性有四种显示模式分别为:
1 | #display: post #默认显示方式 |
博主设置的是hide模式,可根据个人喜好进行设置,将想要设置的模式前的 # 号注释,删除即可。
设置站点概览中的名字及简介
站点概览的下方,也就是头像下面的位置,此处的名字和简介博主找了好久修改方法,最后发现侧边栏作者名调用的是theme.author也就是主题配置文件, 不是在站点配置文件…
实现方法
#需要在主题目录配置里单独添加 author、description 选项,可添加到主题配置文件的末尾,
注意格式! : 后要加空格再写正文
1 | author: Mr. X #可以写你自己的博主名 |
实现效果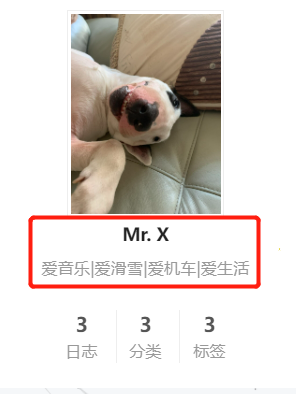
修复-边栏头像下面日志链接错误
记录下出现的问题
在侧边栏下侧位置,日志(上面带有数字的那个位置),点击日志后出现Cannot GET /archives/%7C%7C%20list/问题,无法正常跳转
综合了网上的解决办法:
1、主题配置文件内,将archives:/archives/ || archive 改成archives:/archives/
删掉后面的||archive,的确能够解决问题,但是就没有图标了 不推荐
2、也是我后来采用的方法。 推荐
在next主题目录/layout/_macro/ 找到sidebar.swig文件,定位到theme.menu的行
1 | <a href="{{ url_for(theme.menu.archives).split('||')[0] | trim }}"> |
发现原因是url_for函数将||转码了,
将以上代码替换为以下即可
1 | <a href="{{ url_for(config.archive_dir) | trim }}"> |
开启文章字数统计
显示每篇文章字数
实现方法
首先安装插件,执行以下命令:
1 | npm install hexo-wordcount --save |
然后修改主题配置文件_config.yml ,定位到post_wordcount,将wordcount项的参数由false改为true即可。
实现效果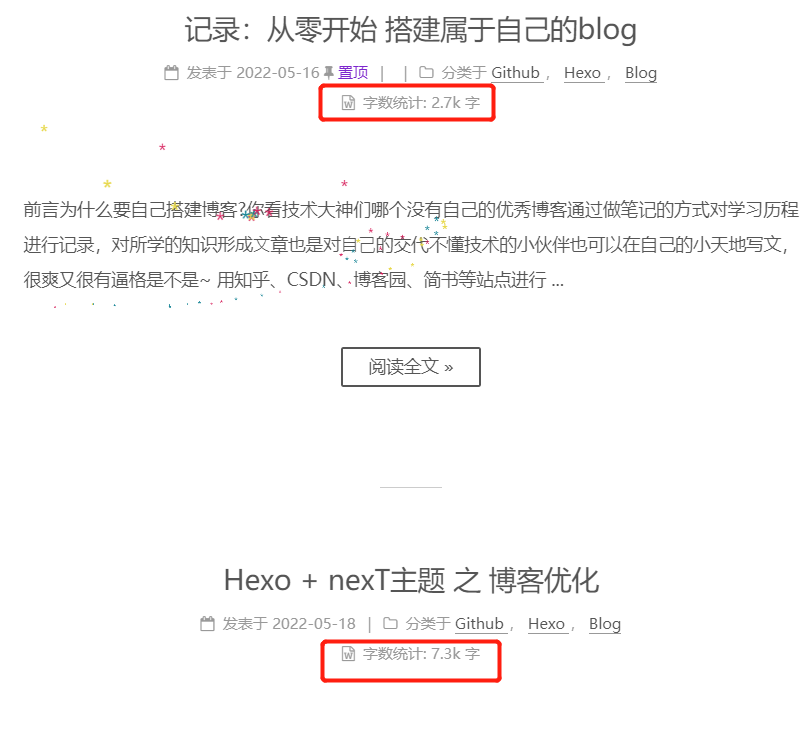
底栏站点文章总字数
实现方法
打开next主题目录/layout/_partials/ 下找到footer.swig文件,在最后添加如下内容
1 | <div class=“theme-info”> |
实现效果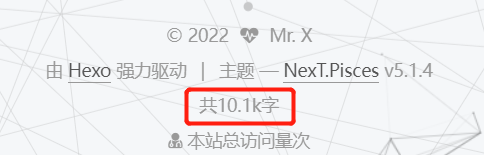
站点访问量统计
实现方法
在 next 主题目录/layout/_third-party/analytics/ 下找到 busuanzi-counter.swig 文件
定位如下内容并进行替换
1 | <script async src="https://dn-lbstatics.qbox.me/busuanzi/2.3/busuanzi.pure.mini.js"></script> |
然后打开next主题目录/layout/_partials/ 找到footer.swig文件,在合适的位置添加以下代码,博主是添加在了末尾
1 | <div class="powered-by"> |
最终结果计数不显示,但是相关的字样和格式已经可以显示出来了,有待继续优化。
还未尝试的方法
https://blog.csdn.net/weixin_41599858/article/details/104806723
设置文章内链接为蓝色
修改原因
链接的默认颜色是白色的,和普通字体颜色相同,不容易区分
实现方法
在next主题目录/source/css/_common/components/post/ 中找到post.styl文件,在文件中添加以下代码:
1 | .post-body p a{ |
建议将代码添加到原文件内容的底部
实现效果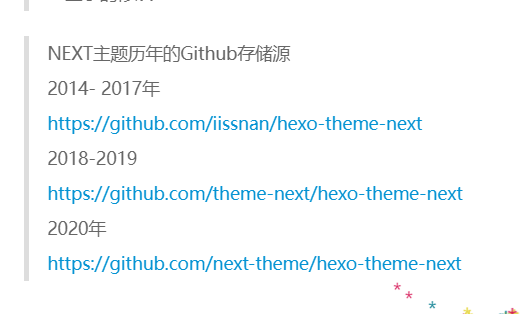
添加友情链接功能
实现方法
在主题配置文件 中找到links属性,修改links_title属性的值为“友情链接”(也可以是其他文案),取消注释links:,然后添加上好友的博客名称和博客地址,其格式如下:
1 | # Blog rolls |
实现效果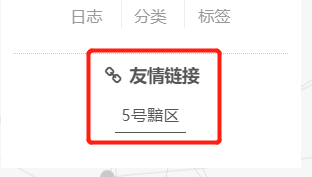
添加动态背景
实现方法
在主题配置文件_config.yml中,定位到如下部分:
1 | # Canvas-nest |
这是已经集成好的几个动态效果,笔者采用的是canvas_nest,读者可依次体验(将false改为true),选择最喜欢的动态背景。
不想逐一尝试的也可直接参考此篇文章中图片:next主题添加背景动画
底部栏小心心
实现方法
打开主题配置文件,搜索footer,修改icon参数为
1 | # Icon between year and copyright info. |
更多ico图标参见:The Icons
实现效果
修改文章底部的#号标签
实现方法
在next主题目录/layout/_macro/找到post.swig文件,搜索 rel="tag">#,将其中的 # 换成<i class="fa fa-tag"></i>
实现效果
鼠标轨迹特效
实现方法
在next主题目录/source/js/cursor目录中新建fairyDustCursor.js文件,并添加以下代码
1 | (function fairyDustCursor() { |
然后在next主题目录/layout/ 中找到_layout.swig 文件里尾部 body前添加引用
1 | {% include '_custom/custom.swig' %} |
最后在主题配置文件末尾添加以下三行代码
1 | # 鼠标移动特效 |
实现效果
去我的博客页面滑动鼠标看看~
鼠标点击特效
下面是四个比较常用的鼠标点击特效脚本,我们可以把它们放置在 主题目录\source\js\cursor\ 目录下,首先创建相应的.js文件
礼花特效代码 :文件名 fireworks.js
1 | class Circle { |
爆炸特效:文件名 explosion.js
1 | "use strict";function updateCoords(e){pointerX=(e.clientX||e.touches[0].clientX)-canvasEl.getBoundingClientRect().left,pointerY=e.clientY||e.touches[0].clientY-canvasEl.getBoundingClientRect().top}function setParticuleDirection(e){var t=anime.random(0,360)*Math.PI/180,a=anime.random(50,180),n=[-1,1][anime.random(0,1)]*a;return{x:e.x+n*Math.cos(t),y:e.y+n*Math.sin(t)}}function createParticule(e,t){var a={};return a.x=e,a.y=t,a.color=colors[anime.random(0,colors.length-1)],a.radius=anime.random(16,32),a.endPos=setParticuleDirection(a),a.draw=function(){ctx.beginPath(),ctx.arc(a.x,a.y,a.radius,0,2*Math.PI,!0),ctx.fillStyle=a.color,ctx.fill()},a}function createCircle(e,t){var a={};return a.x=e,a.y=t,a.color="#F00",a.radius=.1,a.alpha=.5,a.lineWidth=6,a.draw=function(){ctx.globalAlpha=a.alpha,ctx.beginPath(),ctx.arc(a.x,a.y,a.radius,0,2*Math.PI,!0),ctx.lineWidth=a.lineWidth,ctx.strokeStyle=a.color,ctx.stroke(),ctx.globalAlpha=1},a}function renderParticule(e){for(var t=0;t<e.animatables.length;t++)e.animatables[t].target.draw()}function animateParticules(e,t){for(var a=createCircle(e,t),n=[],i=0;i<numberOfParticules;i++)n.push(createParticule(e,t));anime.timeline().add({targets:n,x:function(e){return e.endPos.x},y:function(e){return e.endPos.y},radius:.1,duration:anime.random(1200,1800),easing:"easeOutExpo",update:renderParticule}).add({targets:a,radius:anime.random(80,160),lineWidth:0,alpha:{value:0,easing:"linear",duration:anime.random(600,800)},duration:anime.random(1200,1800),easing:"easeOutExpo",update:renderParticule,offset:0})}function debounce(e,t){var a;return function(){var n=this,i=arguments;clearTimeout(a),a=setTimeout(function(){e.apply(n,i)},t)}}var canvasEl=document.querySelector(".fireworks");if(canvasEl){var ctx=canvasEl.getContext("2d"),numberOfParticules=30,pointerX=0,pointerY=0,tap="mousedown",colors=["#FF1461","#18FF92","#5A87FF","#FBF38C"],setCanvasSize=debounce(function(){canvasEl.width=2*window.innerWidth,canvasEl.height=2*window.innerHeight,canvasEl.style.width=window.innerWidth+"px",canvasEl.style.height=window.innerHeight+"px",canvasEl.getContext("2d").scale(2,2)},500),render=anime({duration:1/0,update:function(){ctx.clearRect(0,0,canvasEl.width,canvasEl.height)}});document.addEventListener(tap,function(e){"sidebar"!==e.target.id&&"toggle-sidebar"!==e.target.id&&"A"!==e.target.nodeName&&"IMG"!==e.target.nodeName&&(render.play(),updateCoords(e),animateParticules(pointerX,pointerY))},!1),setCanvasSize(),window.addEventListener("resize",setCanvasSize,!1)} |
浮出爱心特效:文件名 love.js
1 | !function(e,t,a){function n(){c(".heart{width: 10px;height: 10px;position: fixed;background: #f00;transform: rotate(45deg);-webkit-transform: rotate(45deg);-moz-transform: rotate(45deg);}.heart:after,.heart:before{content: '';width: inherit;height: inherit;background: inherit;border-radius: 50%;-webkit-border-radius: 50%;-moz-border-radius: 50%;position: fixed;}.heart:after{top: -5px;}.heart:before{left: -5px;}"),o(),r()}function r(){for(var e=0;e<d.length;e++)d[e].alpha<=0?(t.body.removeChild(d[e].el),d.splice(e,1)):(d[e].y--,d[e].scale+=.004,d[e].alpha-=.013,d[e].el.style.cssText="left:"+d[e].x+"px;top:"+d[e].y+"px;opacity:"+d[e].alpha+";transform:scale("+d[e].scale+","+d[e].scale+") rotate(45deg);background:"+d[e].color+";z-index:99999");requestAnimationFrame(r)}function o(){var t="function"==typeof e.onclick&&e.onclick;e.onclick=function(e){t&&t(),i(e)}}function i(e){var a=t.createElement("div");a.className="heart",d.push({el:a,x:e.clientX-5,y:e.clientY-5,scale:1,alpha:1,color:s()}),t.body.appendChild(a)}function c(e){var a=t.createElement("style");a.type="text/css";try{a.appendChild(t.createTextNode(e))}catch(t){a.styleSheet.cssText=e}t.getElementsByTagName("head")[0].appendChild(a)}function s(){return"rgb("+~~(255*Math.random())+","+~~(255*Math.random())+","+~~(255*Math.random())+")"}var d=[];e.requestAnimationFrame=function(){return e.requestAnimationFrame||e.webkitRequestAnimationFrame||e.mozRequestAnimationFrame||e.oRequestAnimationFrame||e.msRequestAnimationFrame||function(e){setTimeout(e,1e3/60)}}(),n()}(window,document); |
浮出文字特效:文件名 text.js
1 | var a_idx = 0; |
其中浮出文字的特效是可以自定义文字的
1 | var a = new Array("喜欢我", "不喜欢我"); #此处的文字、数量可以根据喜好进行更改 |
例如:
1 | var a = new Array("和谐", "民主", "文明", "富强"); |
在hexo主题目录/layout/_custom/ 找到custom.swig文件,没有则创建,然后添加以下代码:
1 | {# 鼠标点击特效 #} |
在hexo主题目录/layout/_layout.swig 文件中 末尾处 body前引入:
1 | {% include '_custom/custom.swig' %} |
最后在主题配置文件中添加如下
1 | # 鼠标点击特效 |
这样即可通过在配置文件更改cursor_effect:达成一键快速切换鼠标点击特效。
此功能我在网上找了两篇教程设置略有不同,我用的第二篇成功了,如果不成功的也可对照参考另一篇:
https://blog.csdn.net/qq_40590778/article/details/104662040
https://tding.top/archives/58cff12b.html
后续
在升级next7.x以后,第一篇文章用上了,配置文件位置有变化
实现效果
去我的博客页面点点看~
自定义鼠标样式
实现方法
在next主题目录/source/css/_custom/ 找到custom.styl文件,在里面添加如下代码
1 | // 鼠标样式 |
其中 url 里面必须是 ico 图片,ico图片可以上传到网上,然后获取外链,复制到 url 里就行了
添加2D看板娘或宠物
实现方法
安装helper-live2d插件
1 | npm install --save hexo-helper-live2d |
挑选及下载模型
作者动画展示网站https://huaji8.top/post/live2d-plugin-2.0/
模型名称:
1 | live2d-widget-model-chitose |
选好对应的模型,使用 npm install 模型的包名来进行安装
比如我选择的的是live2d-widget-model-koharu 模型包
在git bash 输入以下代码
1 | npm install live2d-widget-model-koharu |
执行安装后打开站点配置文件 _config.yml ,在最后添加以下代码
1 | live2d: |
插件部署与应用就完成了
实现效果
欢迎点进博客页面在右下角~(目光会跟随鼠标哈)
代码块样式自定义
实现方法
在next主题目录/source/css/_custom/ 找到custom.styl文件,向里面加入如下代码(颜色可以自己定义)
1 | // Custom styles. |
实现效果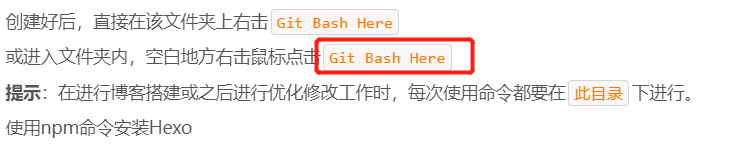
设置代码高亮主题
NexT 使用 Tomorrow Theme 作为代码高亮,共有5款主题供你选择。 NexT 默认使用的是 白色的 normal 主题,可选的值有 normal,night, night blue, night bright, night eighties
实现方法
打开主题配置文件_config.yml定位到highlight_theme 字段,将其值设定成你所喜爱的高亮主题,例如:
1 | # Code Highlight theme |
实现效果
一键复制代码功能
实现方法
在next主题目录/layout/_third-party/下新建文件copy-code.swig
粘贴以下代码进去
1 | {% if theme.codeblock.copy_button.enable %} |
编辑next主题目录/layout/_layout.swig文件,在文件末尾body前的位置添加一行代码:
1 | {% include '_third-party/scroll-cookie.swig' %} |
在next主题目录/languages/zh-Hans.yml文件的post板块中任意位置添加下列代码:
1 | copy_button: 复制 |
我是添加在了这里,注意是post板块中,注意格式前面有两个空格,还有不要插入到其他的子列表里。
如图
最后在主题配置文件中添加开关,编辑主题配置文件_config.yml,添加codeblock模块及添加copy_button的开关,next 5.1.4默认是没有codeblock模块的需要手动添加以下代码,添加在配置文件的末尾即可。
1 | codeblock: |
实现效果
文章插入本地图片
写文章时发现上传的博客文章里面的本地图片显示不出来
综合了网上的文章得出如下结果
实现方法
需要先安装上传本地图片的插件,
1 | npm install https://github.com/EricGerry/hexo-asset-image-0.0.5.git --save |
(注:在找到的资料中,有的显示需要修改一下插件文件,可以先安装后试试,如果不能引用图片,在参考:修改插件内容进行修改)
1、绝对路径本地引用
在source里建立一个文件夹(如images),将图片统一放到source/images文件夹中,通过markdown语法访问它们。
1 |  //(假设图片名:image.png) |
2、相对路径本地引用
图片可以放在文章所在的目录中,需要先在站点配置文件_config.yml中将post_asset_folder: flase修改为post_asset_folder: true
将配置项post_asset_folder设为true后,执行命令$ hexo new article_name,在source/_posts中会生成文章article_name.md和同名文件夹article_name。将图片资源放在article_name文件夹中,文章就可以使用相对路径引用图片资源了。
1 |  |
3、标签插件语法引用
图片在文章和首页中同时显示,可以使用标签插件语法。
1 | {% asset_img image.png 说明 %} |
打开站点配置文件_config.yml 找到post_asset_folder字段,设置值为true
1 | post_asset_folder: true |
博主在绝对路径images/xxxx.png下引用成功了,但是相对路径失败了,感兴趣的可以参考这两篇文章
https://www.freesion.com/article/2218345272/
https://blog.csdn.net/qq_42327444/article/details/104899648
实现效果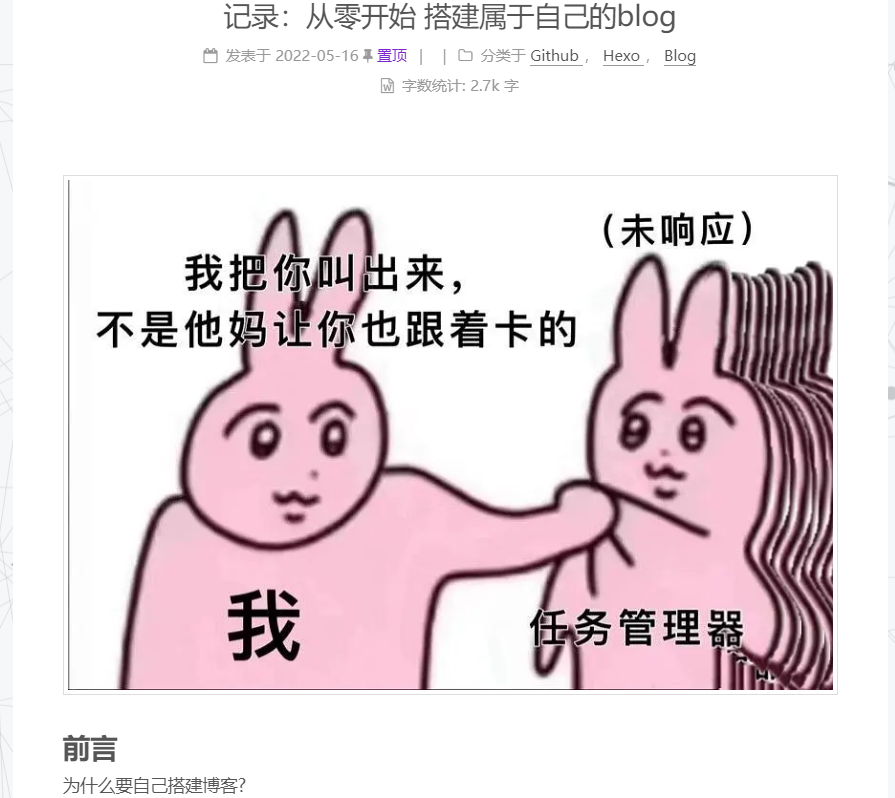
寻找图床
图床,当博文中有图片时,若是少量图片,可以直接把图片存放在source文件夹中,但图片会占据大量的存储的空间,加载的时候相对缓慢 ,这时考虑把博文里的图片上传到某一网站,然后获得外部链接,使用Markdown语法, 完成图片的插入,这种网站就被成为图床。常见的简易的图床网站有:贴图库、外链图床 、阿里云图床、新浪微博和七牛云 ,使用方法可以参看其他文章。图床最重要的就是稳定速度快,所以在挑选图床的时候一定要仔细
在每一篇文章后加本文结束的标记
实现方法
在next主题目录/layout/_macro 中新建 passage-end-tag.swig 文件,并添加以下内容:
1 | <div> |
接着打开next主题目录/layout/_macro/post.swig文件,找到END POST BODY字段,将下方代码插入到END POST BODY后
示意如下:
1 | {#####################} |
最后打开主题配置文件_config.yml,在末尾添加以下三行
1 | # 文章末尾添加“本文结束”标记 |
实现效果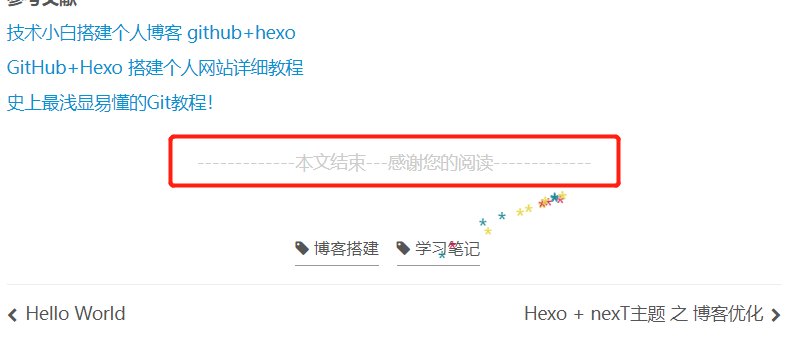
Hexo博客收录百度和谷歌-基于Next主题
还未实验,近期不做,有需要的可参考下文
https://www.jianshu.com/p/8c0707ce5da4
参考文献
http://theme-next.iissnan.com/theme-settings.html
https://qwerty200696.github.io/2017/09/09/blog-opti/
https://blog.csdn.net/awt_fudonglai/category_10191857.html
https://zhuanlan.zhihu.com/p/33616481
https://zhuanlan.zhihu.com/p/106060640
https://blog.csdn.net/qq_33699981/article/details/72716951?spm=1001.2101.3001.6650.1&utm_medium=distribute.pc_relevant.none-task-blog-2%7Edefault%7ECTRLIST%7Edefault-1-72716951-blog-107463289.pc_relevant_default&depth_1-utm_source=distribute.pc_relevant.none-task-blog-2%7Edefault%7ECTRLIST%7Edefault-1-72716951-blog-107463289.pc_relevant_default&utm_relevant_index=2
https://blog.csdn.net/as480133937/article/details/100138838?spm=1001.2101.3001.6650.3&utm_medium=distribute.pc_relevant.none-task-blog-2%7Edefault%7ECTRLIST%7Edefault-3-100138838-blog-114172260.pc_relevant_default&depth_1-utm_source=distribute.pc_relevant.none-task-blog-2%7Edefault%7ECTRLIST%7Edefault-3-100138838-blog-114172260.pc_relevant_default&utm_relevant_index=6https://blog.csdn.net/as480133937/article/details/100138838?spm=1001.2101.3001.6650.3&utm_medium=distribute.pc_relevant.none-task-blog-2%7Edefault%7ECTRLIST%7Edefault-3-100138838-blog-114172260.pc_relevant_default&depth_1-utm_source=distribute.pc_relevant.none-task-blog-2%7Edefault%7ECTRLIST%7Edefault-3-100138838-blog-114172260.pc_relevant_default&utm_relevant_index=6
https://www.freesion.com/article/2218345272/